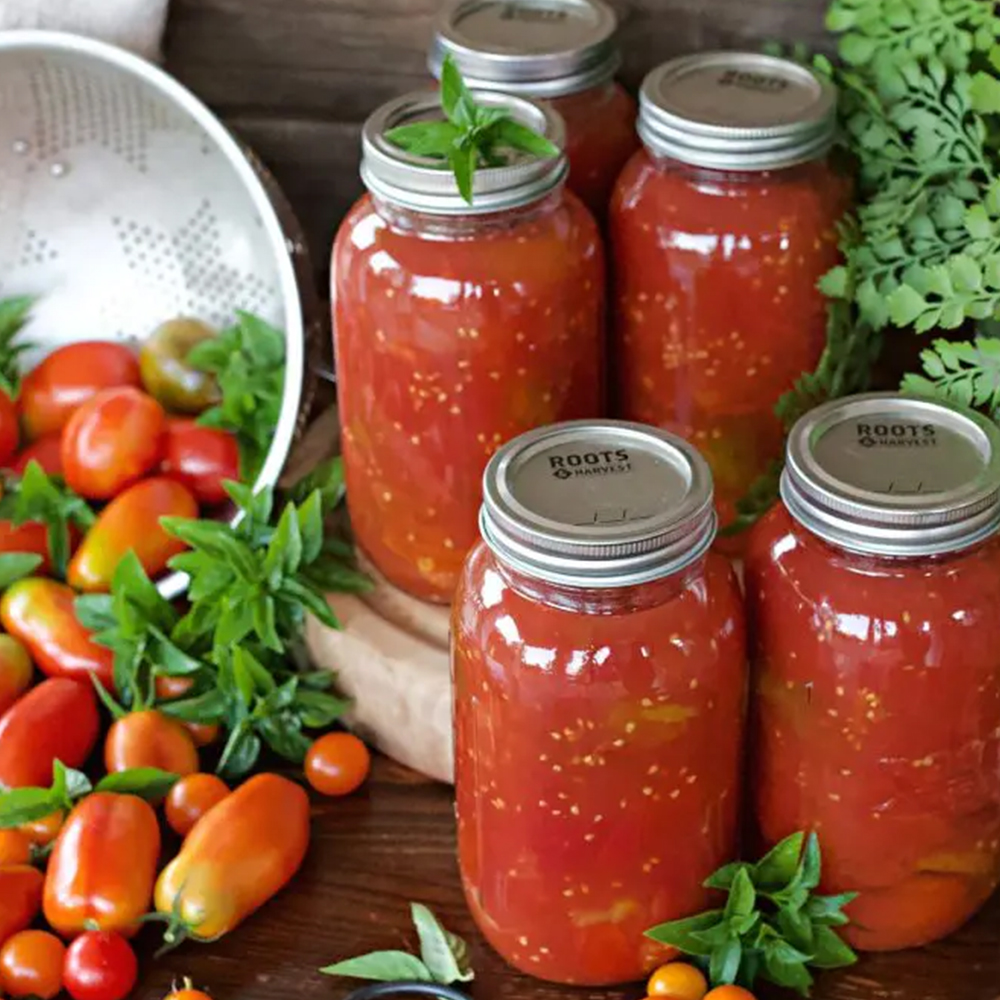
Canning tomatoes is a perfect way to preserve the bounty of your garden, making sure the fresh flavors of summer are tucked snuggly in your pantry all year long. Whether you’re making spaghetti or pizza sauce, tomato soup or a hearty stew, home-canned tomatoes offer a depth of flavor that store-bought versions simply can’t match.
If you’re new to home food preservation, canning tomatoes is an easy place to start. It’s straightforward, requires minimal equipment, and offers a safe, reliable way to store your harvest.
Growing up, my mom was the queen of the garden and the canning process. Our garden was a team effort between my mom and dad, and was always bursting with fresh produce. From the first warm days of spring to the last frost, the rows were tended with care.
To this day, when I walk to the gardens and see those red tomatoes popping, I can’t help but feel a surge of excitement. It’s a connection to family, a way of continuing a tradition I hope to pass down to my children.
Tomatoes are one of the most versatile ingredients you can have in your pantry. Canning tomatoes allows you to create a variety of dishes, from hearty pasta sauces to comforting soups. Using your own tomatoes ensures that you know exactly what’s going into your food—no preservatives or unwanted additives. We start our crop from seed and you can read about how to do that in this tutorial.
But the benefits don’t stop at flavor. Canning tomatoes also allows you to take advantage of peak harvest time. You can enjoy the taste of summer even in the middle of winter, with the added satisfaction of knowing you preserved the tomatoes yourself.
Want to wait until you’ve got a lot of tomatoes to get the canning done in one day? Clean, cut, and freeze them as they come on and wait until you have 30-40 pounds. Then, thaw them out, and get busy!
In the haste to can and preserve for your family, don’t forget to enjoy your garden fresh as well. I think sometimes we get so caught up in preserving, we forget to enjoy the fresh fruit and veggies in the moment. But truly, it’s one of the sweetest parts of summer.
One of my favorite summer treats is a bacon, lettuce, and tomato sandwich. Or, for a simple yet elegant dish, try tomato slices with mozzarella and basil, drizzled with a balsamic glaze.
I also have a special love for Sungold cherry tomatoes. Their sweet taste and perfect snacking size are made for enjoying while you water the garden. There’s something about plucking a warm, ripe tomato right off the vine that feels like the essence of summer.
Before you start canning, gather a few necessary tools and ingredients.
One of the first decisions you’ll need to make is whether to use a pressure canner or a water bath canner. Both methods are effective, but they are suited to different types of foods.
Tomatoes are a high-acid food, which means they can be safely canned using the water bath canning method. (It’s the one we’ll be using.) However, if you plan to can tomatoes with low-acid ingredients, you’ll need to use a pressure canner to ensure safety.
It’s a game changer for your kitchen! When you can as much as we do, the canner is basically on the stovetop all late summer long. This makes making dinner and using the stove for regular food a chore. Moving that heavy canner filled with water on and off your stove every day.
Not any more! I set the electric water bath canner up on the same counter as my sink, fill it up, and use it whenever I want. No moving required. My stove is free to use like normal, which has saved me (and my back!) so much time and effort. When I’m done with the canner, I simply slide it over to the sink, turn the spigot, and the water runs down the drain.
You can purchase the canner below, and make sure to use code: ERYN15 for 15% off + FREE Shipping!
Equipment you’ll need:
Quart jars or pint jars: Choose the size that best suits your needs. Smaller jars are great for single meals, while larger jars are perfect for family-sized portions. Again, I’m loving the Roots & Harvest brand of jars and lids.
New lids and screw bands: These are necessary for sealing the jars properly.
Jar lifter: This tool is essential for safely removing hot jars from the canner. (See this full canner kit)
Teaspoon of citric acid or bottled lemon juice: Adding acid is crucial for maintaining a safe acidity level in your tomatoes.
Slotted spoon: For handling tomatoes during the process.
Large pot: For boiling water and cooking your tomatoes.
Dry towels: For setting hot cans on and placing over cans to help slowly cool.
Canner: To process your jars.
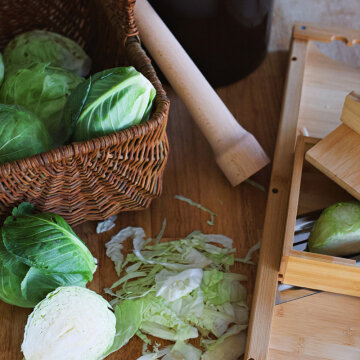
Not all tomatoes are created equal when it comes to canning. Roma tomatoes, heirloom tomatoes, and paste tomatoes are ideal for canning because of their firm flesh and lower water content. These varieties produce a thick, flavorful canned tomato that is perfect for sauces and soups.
If you’re using tomatoes from your garden, aim to harvest them at peak ripeness, usually during the heat of the day. This is when tomatoes have the best flavor and texture for canning.
Start by washing your tomatoes thoroughly under cold running water. Next, you’ll need to blanch the tomatoes. Blanching is a simple process that makes the tomatoes easier to peel.
To blanch tomatoes, bring a large pot of water to a rolling boil. Cut a 1″x1″ X into the skin and carefully lower the tomatoes into the boiling water using a slotted spoon. After 30-60 seconds, remove the tomatoes and immediately plunge them into a bowl of cold water. The skins should start to peel away from the X cutf, making them easy to remove. Once peeled, core the tomatoes and remove any bad spots.
If you’re doing the hot pack method, add the tomato to a stock pot with the others and warm on low medium. Stir carefully to avoid turning your tomatoes into mush.
Some years, I feel like blanching and removing the skins. Some years, I don’t. This year, after I cleaned the tomatoes, sliced them, and placed them in a pot to heat I would take the skins off as then naturally peeled, and if they didn’t I left them on. Removing the skins is more a visual and texture thing. So do it if you feel the need. If you don’t, then don’t.
With your tomatoes prepared and your equipment ready, it’s time to start the canning process. This section will guide you through the entire process, from packing the jars to processing them in a canner.
Begin by preparing your jars. Wash your quart jars or pint jars in hot, soapy water, then keep them warm until you’re ready to fill them. You can do this by placing them in your canner filled with hot water.
When filling your jars, pack the prepared tomatoes into the jars, leaving about an inch of headspace at the top. This space allows for the tomatoes to expand during processing. Pour cooking liquid or tomato juice over the tomatoes, making sure to cover them completely. Use the stick end of a spoon, remove any air bubbles that may be trapped inside the jars.
Add the salt and citric acid or bottled lemon juice to the top of each jar. This step ensures that the tomatoes have a safe acidity level, which is necessary to prevent spoilage microorganisms from growing. If you’re using a boiling-water bath method, this step is particularly important.
Water Bath Canning: Place the filled jars into your boiling water bath or boiling-water canner, ensuring that the water level is at least one inch above the tops of the jars. Bring the water to a steady boil and process the jars for the recommended process time, 45 minutes, which will vary depending on your altitude and the size of your jars.
Pressure Canning: If you’re canning tomatoes with low-acid ingredients, you’ll need to use a pressure canner. Follow the manufacturer’s instructions for your specific pressure cooker, and make sure to adjust for altitude. It’s important to monitor the pounds of pressure carefully to ensure a safe home-canned product.
Once the processing time is complete, turn off the heat and let the jars sit in the canner for about 5 minutes. Carefully remove them with a jar lifter and place them on a dry towel. Avoid placing the jars directly on a cold surface, as the sudden change in temperature could cause them to crack. Let the jars cool at room temperature for 12-24 hours without disturbing them. When they seal, you’ll hear that lovely popping sound, letting you know you’ve been successful.
Yes, green tomatoes can be canned, but they require a tested recipe to ensure a safe acidity level. Green tomatoes are less acidic than their ripe counterparts, so it’s important to follow a recipe from a reliable source, like the National Center for Home Food Preservation.
If you’re adding low-acid ingredients to your canned tomatoes, you’ll need to use a pressure canner to ensure safety. Low-acid food requires higher temperatures to destroy potential spoilage microorganisms, which a water bath canner cannot achieve.
Canning tomatoes is more than just a way to preserve food; it’s a connection to the past, a method of self-sufficiency, and a way to ensure your family enjoys the best possible flavors all year round. The process is straightforward, making it an excellent project for beginners.
Tag me in your canning recipes over on Instagram. Let me cheer you on!
If you’re interested in learning more about canning tomatoes or other foods, several resources are available:
Your local extension office is a valuable resource for personalized advice, troubleshooting, and information on the best practices for your area.
Agriculture Information Bulletins and other publications provide detailed instructions on canning and preserving a variety of foods.
Yield: 7-9 quarts or 14-18 pints, depending on the size of the tomatoes and jars used.
Prep Time: 1 hour
Cook Time: 45 minutes
Total Time: 1 hour 45 minutes
This recipe will help you stock your pantry with delicious, versatile home-canned tomatoes that can be enjoyed in your favorite recipes all year long. Happy canning!
20 pounds ripe tomatoes (Roma, paste, or heirloom)
2 Tablespoons bottled lemon juice per quart jar (1 Tablespoon per pint jar)
1 Teaspoon salt per quart jar (1/2 Teaspoon per pint jar)
Boiling water or tomato juice (for packing)
Prepare Tomatoes:
Wash the tomatoes thoroughly under cold running water.
Bring a large pot of water to a rolling boil. Blanch tomatoes in the boiling water for 30-60 seconds, then immediately transfer them to a bowl of cold water. Peel the skins, core the tomatoes, and remove any bad spots.
Prepare Jars:
Wash your jars, lids, and screw bands in hot, soapy water. Keep jars warm in your canner or oven until ready to fill.
Add 2 tablespoons of bottled lemon juice to each quart jar (use 1 tablespoon for pint jars). Add 1 teaspoon of salt per quart jar (use 1/2 teaspoon for pint jars).
Pack Jars:
Pack the tomatoes tightly into the jars, leaving 1 inch of headspace at the top.
Pour boiling water or tomato juice over the tomatoes to cover them, still maintaining 1 inch of headspace.
Use a non-metallic spatula to remove any air bubbles by sliding it around the inside edge of the jar.
Seal Jars:
Wipe the rim of each jar with a damp cloth to remove any residue.
Place the lids on the jars and screw on the bands until fingertip tight.
Process Jars:
If using a boiling-water canner, ensure the water level is 1 inch above the tops of the jars. Bring to a steady boil and process quart jars for 45 minutes (adjust for altitude if necessary). Pint jars should be processed for 40 minutes.
If using a pressure canner, process jars according to the manufacturer’s instructions, adjusting for altitude.
Cool and Store:
Once the processing time is complete, turn off the heat and let the jars sit in the canner for 5 minutes.
Carefully remove the jars with a jar lifter and place them on a dry towel. Allow the jars to cool at room temperature for 12-24 hours without disturbing them.
Check the seals after cooling. If the lid does not flex up and down, the jar is sealed. Store sealed jars in a cool, dark place. If any jars did not seal, refrigerate and use them within a few days.
Yield: 28 Serving Size: 1
Amount Per Serving: Calories: 60Total Fat: 1gSaturated Fat: 0gTrans Fat: 0gUnsaturated Fat: 0gCholesterol: 0mgSodium: 114mgCarbohydrates: 13gFiber: 4gSugar: 9gProtein: 3g
Please leave a comment on the blog or share a photo on Instagram