healthy living
Mason Jar Fermentation Done Right
Posted under: Fermentation And Pickling, Food Preservation, healthy living, how to

Posted under: Fermentation And Pickling, Food Preservation, healthy living, how to
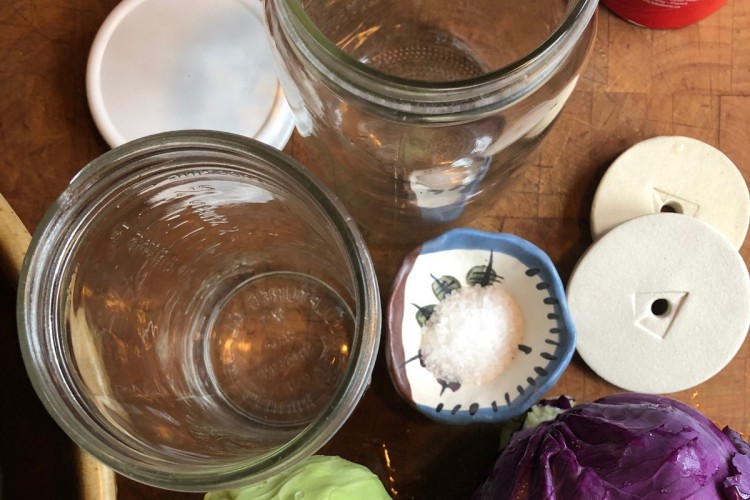 For beginners, choosing a fermentation vessel can be as simple as going to your cupboard and pulling out one of the glass mason jars hiding in the corner. There are many great fermentation vessels on the market, but mason jars are by far the easiest vessel to use for several reasons - they are inexpensive, are available in many sizes, they are easy to find, and the clear glass allows you to see how your ferments are progressing. Another timesaving advantage of fermenting in jars is being able to store your finished ferments directly in the fridge, without having to transfer them into another vessel. Sold? Okay, let’s pick out the right jars and lids for you.
Before I ferment or can in any mason jar, I inspect the jar for blemishes or cracks, and run my finger around the rim to see if there are any chips. Set any imperfect jars aside, and do not use for this purpose. If you are a jar-hoarder like some (I’m not naming names here!) you should have plenty of good clean mason jars to ferment in. Try your best to choose the right sized jar for your recipe. Mason jars are a great standard to have in your cupboard, and will hold approximately 2 to 2.5 pounds of produce. However, when the garden is booming, or when your favorite veggies are on sale at the farmer’s market, you may want to have some larger, half-gallon sized mason jars on hand. (These are a personal favorite of mine.)
Next you will need to select a lid. While two-piece metal lids are great for canning, I prefer to use wide-mouth plastic lids that are made specifically for mason jars. Fermented foods are naturally acidic and often salted, and a plastic lid fares better under these conditions. Plastic lids are also not as airtight as metal lids, which is a plus if you are burping your jars (described below). It is certainly okay to use traditional metal lids, just be sure your lids are rust-free and in good condition, and screw them on loosely to allow gases to escape.
When fermentation happens in an open or lidded vessel (as it has for millennia) the surface of the fermenting food is subject to the growth of mold or yeast. Today, there are a variety of airlocks that fit directly onto mason jars. Airlocks help the gases escape, while keeping mold or yeast from entering the jar. If you are concerned about mold or yeast growth, consider using an airlock like the no-maintenance pickle pipe.
If you are not using an airlock, do not tighten the lid fully, and you will need to burp your jar. What?? As the good bacteria flourish and eat up the sugars in your veggies, they emit carbon dioxide and other gases. In a tightly sealed jar, these gases will build up pressure, and if left alone, the lid could pop open, or in an extreme case, a jar could burst. This is really no worry if you burp your jar once or twice a day. Simply untwist the lid and hear the “pffftt” of carbon dioxide escaping.
Lacto-fermentation is not as quick or volatile as a yeast fermentation (like wine or mead) in which case you would definitely want an airlock. However, if it is warm, and especially in summer, do not tighten the lids all the way, be sure to burp your jar twice a day, or use an airlock.
 Fermentation Weights for Mason Jars
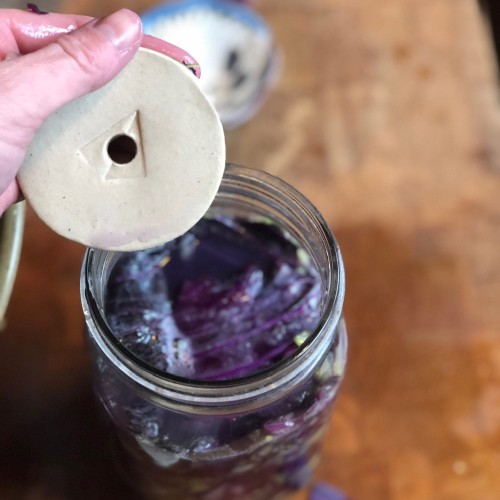
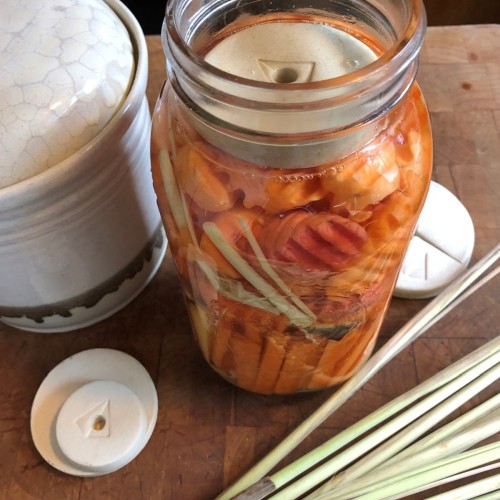
So you’ve chosen your jar and lid, and your recipe is made and packed tightly in the jar. What next? The number one most important thing to do when fermenting foods is to keep the substrate (the food you are fermenting) under the liquid line. This will create an anaerobic environment to limit mold or yeast growth on your veggies. Fortunately there are a wide variety of weights for fermenting out there! While some seasoned fermenters use a small glass jelly jar filled with water and nested into the neck of your wide-mouth mason jar, my personal preference is ceramic weights. (Full disclosure, these are my own design.) These weights come in two sizes - to fit into the neck of regular-mouth mason jars or wide-mouth mason jars. Ceramic weights are food-safe, non-reactive, simple, effective, and easy to clean. Other methods of weighting include glass weights, fermentation springs, or using a boiled rock. While the rock method is simple and thrifty, you’ll want to avoid using any type of rock that will dissolve or react to the acidity in your ferments.
At times a bit of mold or a filmy white blanket of Kahm yeast will bloom on the surface of your ferments overnight. Not to worry, neither of these is harmful! Scoop off the unwanted layer with a clean spoon. After the layer is gone, I will sometimes go as far as dipping a clean cloth or paper towel in boiling water and wipe the inside neck of the jar to remove lingering mold or yeast particles. If you would like to limit unwanted surface growth as much as possible, invest in a simple airlock.
At this point, there is nothing more to do than to start fermenting! Your first batch may not be your favorite, but make notes, and try different recipes until you get comfortable with the process. You can start with this simple sauerkraut recipe, or try a brining method like the recipe below.
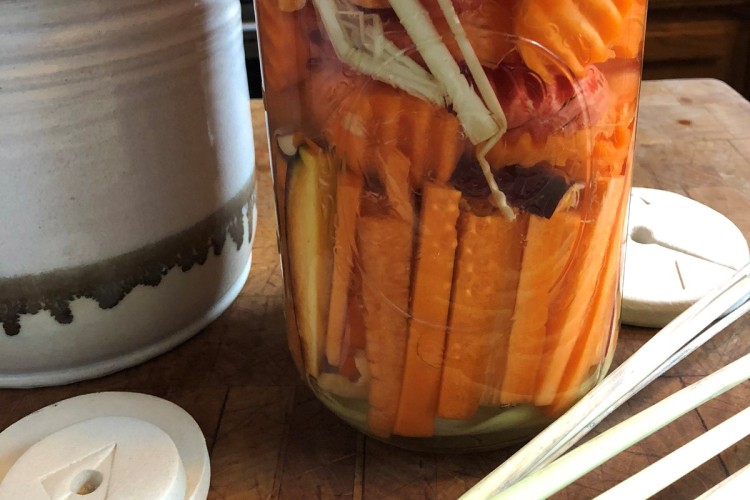 Fermented Lemongrass Carrots Recipe
Ingredients:
2.5 lb Carrots
1 stalk Lemongrass, trimmed and bruised
.5 Tbs. Sea Salt
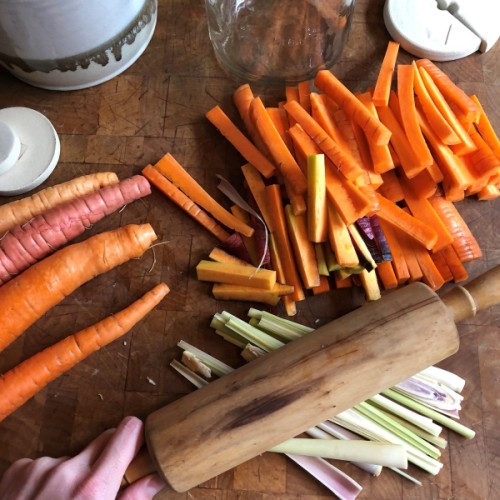 Directions: Wash and trim the carrots, and chop into sticks or chunks. (Try to make all pieces roughly the same size to ensure even fermentation.) Trim and bruise the lemongrass with the back of heavy knife, or a rolling pin, and chop into 4-6” lengths.
Pack tightly into a clean, 1 qt. glass mason jar. Dissolve the sea salt in 3 cups cold water. Add additional water until veggies are covered, and weight the veggies under the liquid line.
Ferment for 5-14 days* (to taste) on the counter, out of direct sunlight. When fermentation is to your liking, store in the fridge. *Fermentation will occur faster in warmer weather.
 How to Store Fermented Foods
When your recipes have fermented to the perfect point, slow the process by storing them in the fridge. Be sure to label your ferments – I simply write the date on the jar with a permanent marker, which scrubs off easily later when washing the jar. If I am giving some away as a gift, I might opt for a cute sticker label.
As you start to eat your healthy fermented foods, and airspace in the jars increases, you can transfer to smaller jars in order to limit exposure to oxygen. This helps to keep the ferments fresh for a longer amount of time. Ferments will keep for several months in the fridge, but they do tend to get softer over time. I like to enjoy my fermented pickles within three months. Happy fermenting!
 Sienna Orlando-Lalaguna is the owner and maker behind Sienna Ceramics. She is a foodie, urban gardener, and plant-lover with a background in professional cooking. Her interest in food preservation stems from a love of local, organic produce, and a desire to extend the harvest from season-to-season. Sienna is interested in reviving the knowledge of fermentation, and bringing this ancient process back into modern communities like yours!